

How To Reduce Size Of Pic But Quality Doesnot Effect
Whether you're creating a website, publishing a blog post, or running a social media account for your business, users expect properly-sized, high-quality images. By knowing how to resize images without losing quality, yous'll help your brand look professional and found trust with users. However, in that location'due south another crucial factor when adding images to your site: load fourth dimension. High-quality images are larger in file size, which tin can result in irksome performance and a poor user experience. In this postal service, we'll walk through how to resize an image without losing quality. So nosotros'll take a brief expect at other prototype resizing tools so y'all can find the right one for your website. Imagine two ecommerce sites selling the same pair of shoes — one has blurry and/or distorted product screenshots, and the other has crystal clear ones. Which are you more than likely to buy from? Well-formatted images don't just brand the browsing and purchasing feel easier — they also convey professionalism. On the flip side, messy images can imply a lack of competence. If you tin can't get your images right, how tin can you get your products right? In addition to impacting the user experience in these means, images that aren't properly resized bear on website performance. Oversized, high-resolution images might expect good on the front, merely their file sizes are large. That ways browsers will accept longer to load them, which will increase your website'south overall load fourth dimension. Often, this extra load time is unnecessary. Say yous have an image that is 2000 x 2000 pixels only the container information technology's going in is only 200 x 200 pixels. In that case, your browser withal loads every pixel even though information technology'due south constrained to a much smaller brandish area. That means the browser has to load x times more than what's necessary. There'south no standard width or summit you should aim for when resizing your images. It volition depend on a multifariousness of factors, including where you're putting them on your website, whether the majority of your visitors are using desktop or mobile, and so on. Still, a rule of pollex is that you want to strike a balance between the lowest file size and an acceptable quality. Generally, an epitome file size of 100KB or less is acceptable. Some quality loss will happen, but information technology won't be noticeable if done properly. For the sake of this demo, nosotros'll utilise the free Adobe Express prototype resize tool, just these bones steps apply to any tool. With virtually image resizing tools, you can elevate and drop an image or upload it from your computer. Some tools even allow you to copy and paste an image. Some resizing tools permit you to choose from a listing of preset resizing dimensions based on various social media platforms and common screen sizes. If you'd similar, cull one of these presets from the carte. If y'all'd rather set custom dimensions yourself, choose the Custom pick and motion on to the side by side stride. Let'due south say the paradigm you want to resize is 6000 x 4000 pixels, and you want to resize it to 600 x 400 px to make information technology the featured image of your blog mail. Yous merely have to type in those dimensions. One time the image has been resized, click Download. You can at present download the prototype with its new dimensions and upload it to your website. Afterwards completing the to a higher place steps, you lot may find that your paradigm file size is still to a higher place 100KB. To become it even lower, we can turn to epitome compression. At that place are many image compression tools available for free online. For these steps, we'll exist using the Squoosh tool from Google. Merely, once again, these steps generally apply to whatsoever compression tool. As shown above, the MozJPEG pinch method and a quality of 75 are chosen past default, which reduced the image file size from 176KB to 72.8KB. Since we're now nether 100KB, nosotros could download the new compressed epitome. However, if your original epitome file size is larger, it may not be this easy to become beneath 100KB. You also may prefer a different compression method or a college quality. We'll look at these next. To view compression options in Squoosh, open the dropdown bill of fare under Compress. You'll come across several options listed, but at that place are three that will probably be your go-tos. These are: Past default, image quality is set to 75. If you lot desire to further reduce the file size, you tin can drag the slider down and compare the output — depending on where and how you place the final image on your website, reducing quality might not be noticeable or touch the user experience. This may take some trial and mistake before yous strike the right balance of quality and file size. Alternatively, if your image size is below 100KB after compression, you can raise the image quality to be closer to 100KB. Above, I've raised the quality from 75 to 80, enough to improve quality while keeping the file size below 100KB. To resize a PNG file without losing quality, use a lossless compression tool that supports transparency and PNG files. There are many pinch tools available online that can practise this for free. You can choose a PNG resizing tool that fits your preferences, but most of these tools work the same while retaining transparency and prototype quality. Hither are some options we recommend: Manually resizing each and every prototype you upload to your website would crave a huge investment of time and free energy — and likely some experience in graphic design. The adept news is you can simplify the process with an image resizing tool. Below is a collection of the all-time image resizing tools. They range in functionality and toll so you tin can choose the right 1 for your needs and budget. Permit'southward go started. Adobe Photoshop Express is a complimentary photo editing tool for mobile that enables you to resize, compress, and crop any image in a few clicks. You can resize a photo for Facebook, a LinkedIn profile image, Twitter banner, YouTube thumbnail, or screenshot. You can resize as many images equally you want for complimentary, but you'll accept to create an account to download them. Resizing.app is a gratis photo editing tool with an incredibly elementary interface. You can resize the paradigm by width, height, pct, the largest side, or another custom value. Once yous resize the paradigm, you can optimize it with the sliding calibration and convert it. One drawback of this tool is that information technology doesn't show the file size when you're optimizing it. That tin get in hard to know when to stop sliding the calibration to the right. BeFunky is designed to be Photoshop for beginners. It'south rich with features but presented in a user-friendly interface. Y'all can resize, crop, and rotate images, add customizable graphics, frames, overlays, and textures, and more. With BeFunky's Batch Image Resizer, you can even resize images in majority instead of one by 1. In that location's a free version with 125 digital furnishings available, and a premium version with hundreds more than. With PicResize, you can easily resize, crop, and edit your images for gratis. You can decrease the image by pre-gear up percentages, or by setting the width and top in pixels. It's important to note two things. The complimentary version of PicResize is only for shrinking photos; you'll have to purchase PicResize Pro to enlarge them. You tin only compress JPG file formats and instead of a slider, in that location's a dropdown carte with the options: good, better, all-time. While you can't run into the prototype file size, you can set a maximum file size. Resizing images without losing quality is an important skill, whether you're a site owner, social media marketer, blogger, or something else. Thankfully, the process is easy thanks to the diversity of free and premium tools bachelor online. You lot tin can resize your images in less fourth dimension and improve your website speed and delight your visitors every bit a result. Editor'south note: This post was originally published in Dec 2020 and has been updated for comprehensiveness. ![Download Now: 150+ Content Creation Templates [Free Kit]](https://no-cache.hubspot.com/cta/default/53/5478fa12-4cc3-4140-ba96-bc103eeb873e.png)
Why Information technology's Important to Resize Images Without Losing Quality
How to Resize an Image without Losing Quality
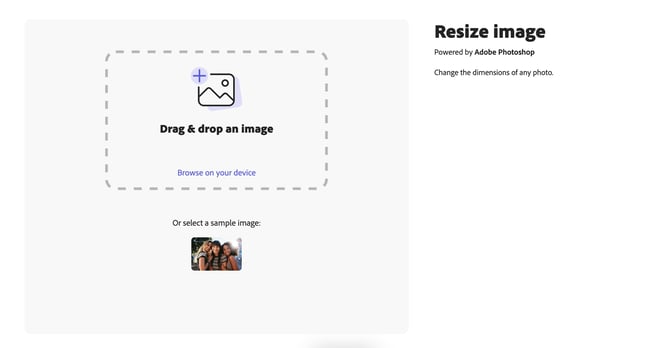
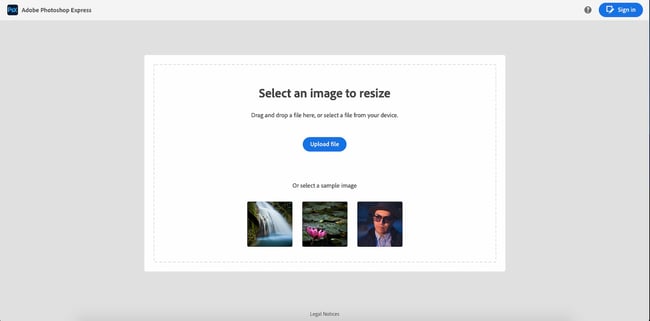
ane. Upload the image.
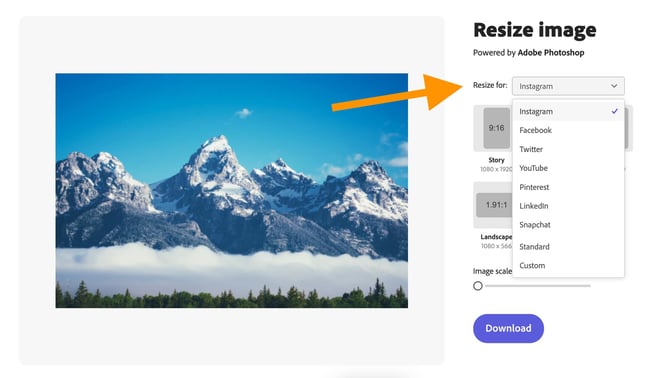
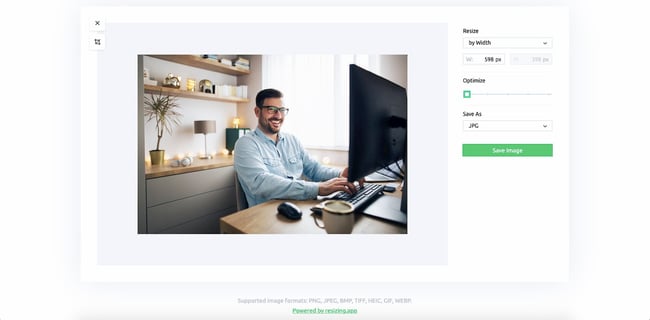
ii. Choose a resizing option.
3. Type in the width and height dimensions.
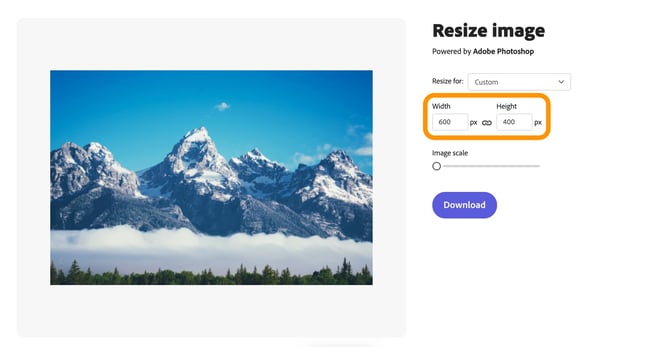
4. Download the resized image.

How to Resize an Image to 100KB
ane. Upload the image.
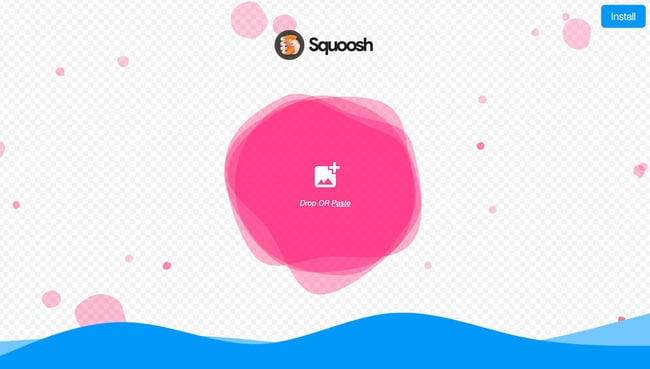 Starting time, open Squoosh in your spider web browser or as a desktop awarding, then elevate your prototype into Squoosh. Alternatively, you can copy and paste the image into Squoosh.
2. Check the current file size of your image.
 After uploading your image, Squoosh will brandish the image in 2 panels. On the left is the original epitome you uploaded, and on the right is the compressed version. At any point, y'all can click and drag the eye bar to compare the quality of your image before and later compression.
3. Choose your output format.
 Depending on the blazon of image you're compressing, you may desire to choose a different compression method than the 1 that's selected past default.
four. Adjust the image quality.
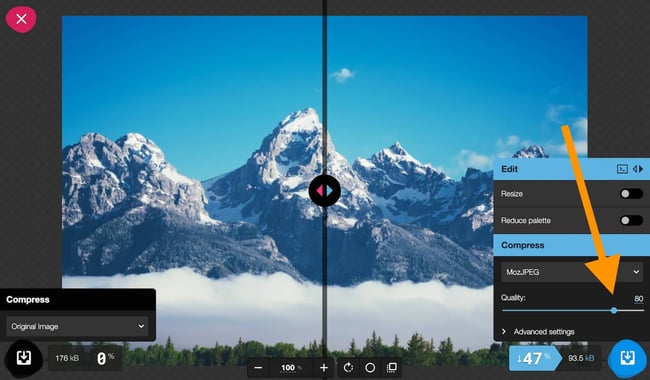 Once you've chosen your compression method (we're going to stick with MozJPEG because we're compressing a detailed photograph), you lot tin further refine your compression by adjusting image quality.
5. Download the compressed epitome.
 When you're ready to download your compressed image, click the blue download button. Then, upload the file to your website and preview how information technology looks on your folio.
How to Make a PNG Smaller Without Losing Quality
Image Resizing Tools
Adobe Photoshop Express
Resizing.app
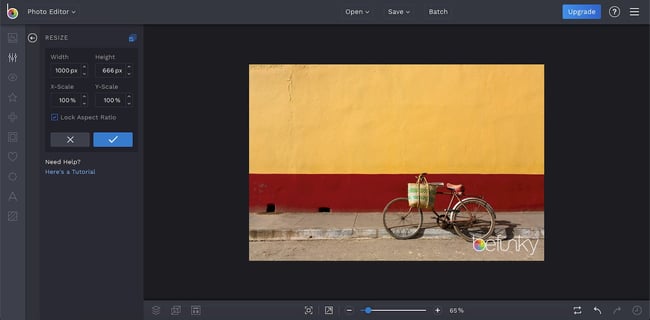
BeFunky
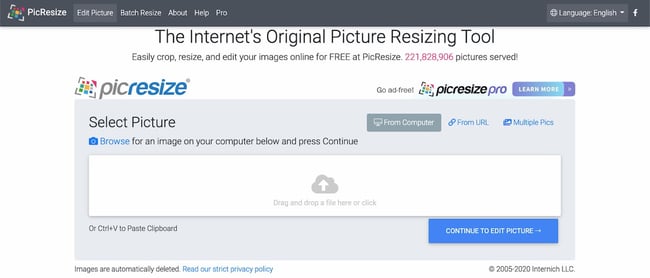
PicResize
Ready to resize?

Originally published Feb xv, 2022 7:00:00 AM, updated February 15 2022

How To Reduce Size Of Pic But Quality Doesnot Effect,
Source: https://blog.hubspot.com/website/resize-image-without-losing-quality
Posted by: goodsoncined1957.blogspot.com
0 Response to "How To Reduce Size Of Pic But Quality Doesnot Effect"
Post a Comment